Cabbage and Carrot Sauerkraut

We all have a vast community of bacteria that live within us, called the microbiome. The microbiome in our gut controls many of our body’s key functions and is crucial to our overall health. A balanced microbiome regulates the immune system, modulates weight and metabolism, and provides us with critical vitamins. Your mental health, not only your physical health, is deeply influenced by the health of your gut too. A healthy microbiome supports mood and brain function. When your microbiome falls out of balance, you can become ill. Consuming naturally fermented foods is one of the best ways to balance the microbiome in your gut. Fermented foods are natural probiotics and are rich in live bacteria that replenish the microbiome, helping it maintain the right proportion of friendly bacteria for optimal health and weight loss. Sauerkraut is a fermented food along with Kefir, Kimchi, and Kombucha, to name a few. The name “sauerkraut” literally means sour cabbage. A process called lacto-fermentation makes sauerkraut. When the cabbage is submerged in brine, an anaerobic (without oxygen) environment is created in which glucose and other sugars in the cabbage are converted into energy and lactic acid.

How to Make Sauerkraut

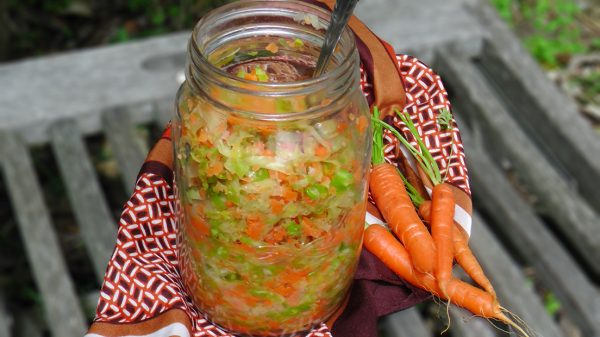
Making sauerkraut is a good place to begin with when starting out with fermenting foods because you need very little ingredients or equipment. All you need is cabbage, salt and a jar. skraut1
You Will Need
  • 1 medium green or red cabbage
  • 2 medium carrots
  • 1 1/2 tablespoons Himalayan salt
  • 2 large jars
What To Do
  1. Remove the outer leaves of your cabbage. Put aside a couple of large leaves to use at the end.
  2. Slice or shred the cabbage into small pieces and grate the carrots.
  3. Place cabbage and carrot in a large bowl with the salt.
  4. Using your hands start to massage and squeeze the cabbage. Keep massaging and squeezing it. The cabbage and carrot will start to become limp and watery over time. This takes about 5-10 minutes.
  5. Tightly pack your shredded cabbage and carrot mixture into each jar, and compress down using your hands or a smaller jar to remove any air. Top with a cabbage leaf, tucking it down the sides of the jar. Make sure the veggies are completely covered with brine and that the brine is all the way to the top of the jar, to eliminate any trapped air.
  6. Put the lids on your jars loosely, as they will expand due to the gases produced in fermentation. Alternatively, you could cover with a cheesecloth and push the veges under the liquid each day to make sure they are submerged.
  7. Keep the jars at room temperature on your counter for 3-10 days. Sauerkraut or fermented veggies are usually done in 3 – 4 days. In the winter, they may need 7-10 days. The only way to tell when they are done is to have a taste. When you are happy with the taste, pop the jars in the fridge to slow down the fermentation. The sauerkraut will slowly mature further if you don’t eat it all before then!
  8. Never eat out of the jar, as you will contaminate the batch. Use a clean spoon and serve on another plate. Make sure the remaining sauerkraut is covered with liquid before replacing the lid.

Super Berry and Celery Energiser Smoothie

Berries and celery: what a great combo! Berries have high levels of antioxidants and 
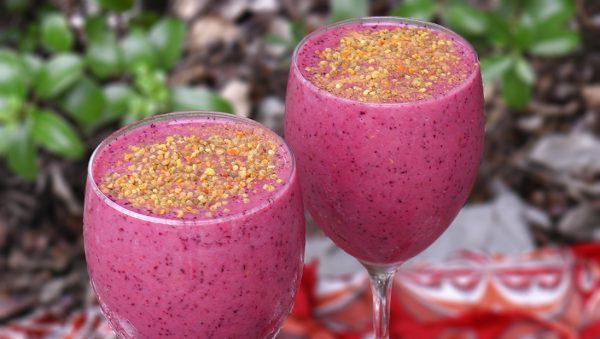
 phytochemicals, which are naturally occurring nutrients that help protect cells from damage, helping to fight cancer and other illnesses. Celery is very rich in vitamin K, vitamin A, potassium, folate and vitamin C, and also provides a good amount of dietary fiber. Celery is also rich in electrolytes and has a cooling effect on the body, fighting inflammation. Celery also helps to clear the digestive system and boost cognitive function. To round off this powerful combination, I’ve added flaxseed oil which is high in EFA (essential fatty acids) for its healing compounds and bee pollen which is rich in a range of vitamins, minerals and protein, making it a great natural energiser and digestion aid. Voila! Energiser Smoothie! Oh, and it tastes divine too. ☺  
What You Need
1 x frozen banana (peel and break into pieces before freezing) ½ Cup of raspberries ½ Cup blueberries 4 stalks of celery 1 Cup of coconut water ½ teaspoon cinnamon 1 Tablespoon LSA 1 Tablespoon flaxseed oil 1 teaspoon bee pollen  
What You Do
1. Blitz all ingredients except bee pollen in your blender. 2. Pour smoothie into two glasses and sprinkle bee pollen over the top. 3. Enjoy.    

Raspberry and Chocolate Amazeballs

I had a little play around with ingredients and came up with these delicious tart but still sweet little treats. They got devoured pretty quickly by my kids! These would be great lunchbox fillers. They are gluten, dairy and sugar free and so good for you, as raspberries and sesame seeds are high in anti-oxidents and anti-inflammatory phyto-nutrients. Oh and they taste fab too!  
You will Need
1/4 Cup cacao powder 1 Cup coconut 1/2 Cup sesame seeds 1 Cup raspberries (frozen or fresh) 7 dates or 2 teaspoons of honey 1/2 Cup Coconut Oil Pinch Himalayan Salt 1 teaspoon freeze dried raspberry powder Extra coconut for rolling
To Do
1. Soak the dates for a couple of hours. You could use honey instead of dates if you wish. 2. Then put all the ingredients except the raspberry powder and the extra coconut in a food processor and blitz. 3. Roll the mixture into balls. 4. Add the teaspoon of raspberry powder to the extra coconut and mix until pink. 5. Roll the balls through the pink coconut. 6. Eat now or pop in the fridge to get a little firmer. 7. Makes 16 balls.    

Blueberry and Banana Chip Muffins

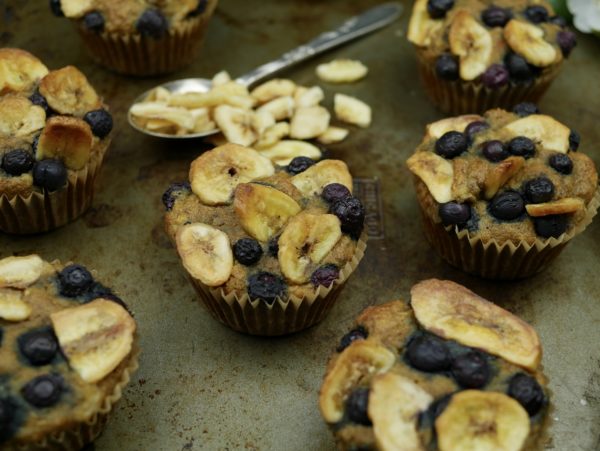
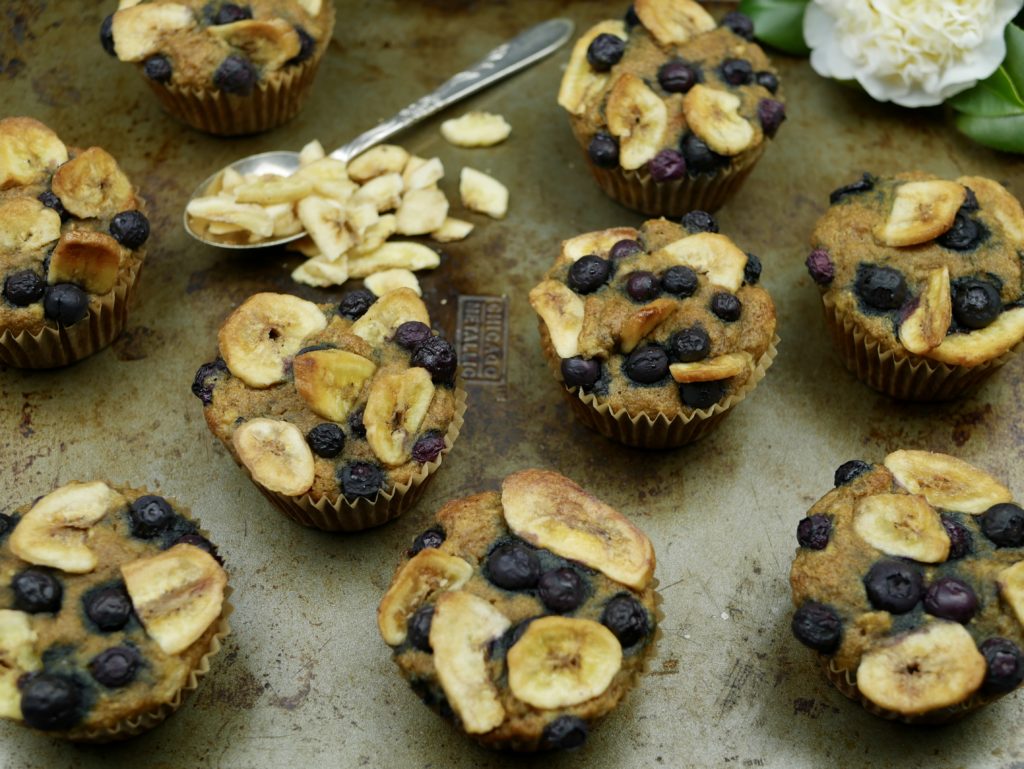
Preparation: 20 minutes Cooking: 40 minutes Servings: 12 medium or 24 mini muffins   Blueberries are definitely one of my favourite fruits; I can’t resist eating them almost every day when they’re in season. These lovely and moist blueberry muffins are perfect for afternoon tea or kids’ school lunchboxes. They are delicious warm from the oven, the blueberry sweetness bursting into the soft almond crumb. Top with banana chips for a playful crunch.   Brain Food Note The delightfully small and sweet blueberries pack a powerful antioxidant punch and act as little brain protectors. They are even more powerful when combined with foods that are rich in healthy fats.   3 bananas 1/2 cup coconut sugar 3 organic eggs juice of 1 lemon 100 grams melted butter or 1/4 cup coconut oil 2 cups almond flour 3/4 cup tapioca flour 1 teaspoon gluten-free baking powder 1 teaspoon baking soda 1/2 teaspoon sea salt 1 cup fresh or frozen blueberries 1/2 cup of banana chips   Preheat the oven to 180 degrees C(or360 degrees F) and line a 12-hole muffin tin or 24-hole mini tin with paper cases; alternatively, grease the tins with a little coconut oil. Place the bananas in a large bowl and mash with a fork. Add the coconut sugar, eggs, lemon juice, and coconut oil or butter. Using a large wooden spoon, mix until combined. In a separate bowl, mix the flours, baking powder, bicarbonate of soda, and sea salt. Add the mashed banana to the egg mixture and mix well, then add the flour mixture and stir with a wooden spoon until just combined. Don’t overmix or the muffins will lose their lightness. Spoon the batter into the muffin cases or tin and then top with blueberries and banana chips. Bake muffins for about 40 minutes, and mini muffins for 20 minutes, or until a skewer inserted into the centre of a muffin comes out clean.  

Heavenly Ginger and Fig Cheesecake

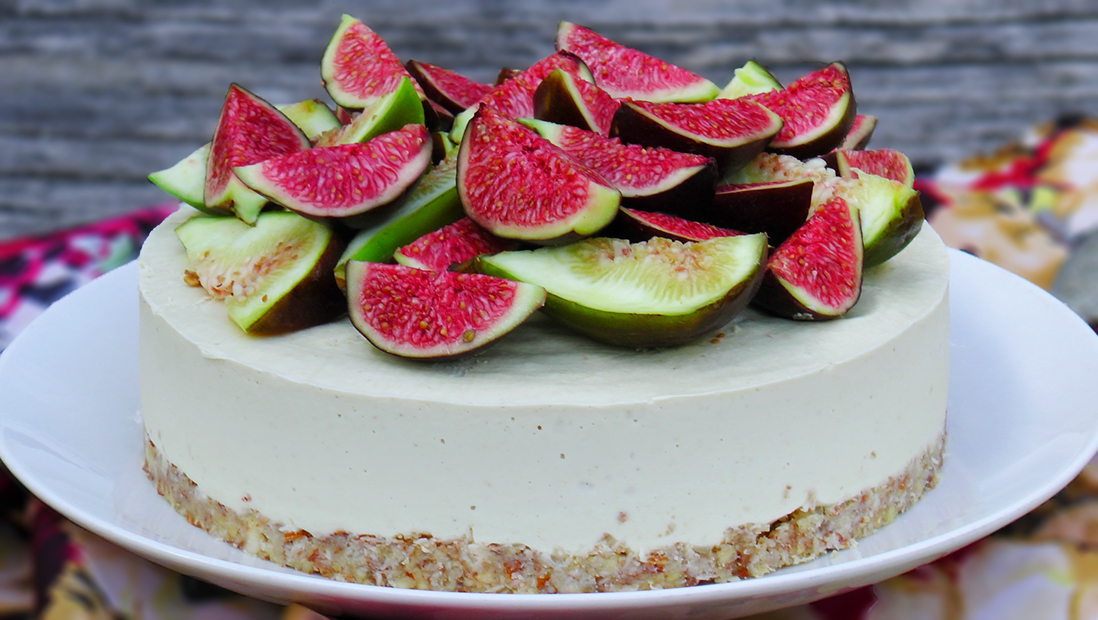
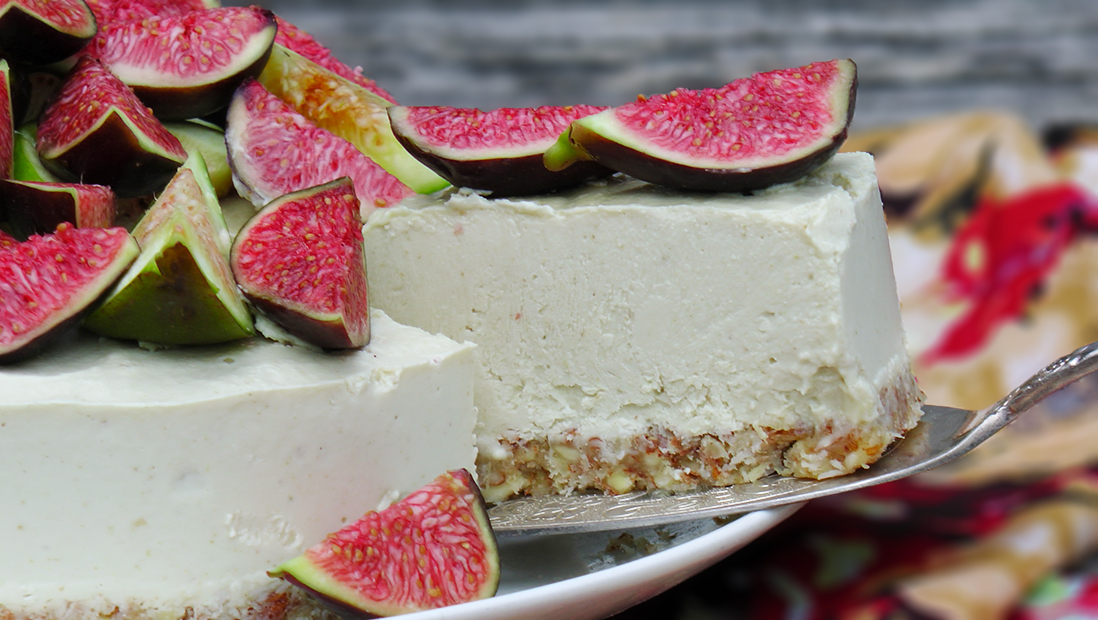
I brought these wonderful, very ripe, and juicy figs at my farmers market last weekend. I love figs; we had a large tree on our property when I was growing up and I used to sit under it in the summer and eat plenty of them. The sweet, succulent fig is rich in phyto-nutrients, anti-oxidants, and vitamins. What to do with them? Ok, I need to make a birthday cake for a friend. Why don’t I marry this delicious, sweet fruit with another fave of mine – ginger! Ginger and fig birthday cake, yippee! I gave it a whirl and the result was sublime…   gingerfig6

You Will Need:

Base:
1 cup of almonds ½ a cup of coconut 2 thumb size pieces of ginger (finely chopped) 2 teaspoons of ground ginger A pinch of salt 2 tablespoons of coconut oil
Filling:
2 cups of cashew nuts 1 cup of almond milk Juice of 1 lemon 2 tablespoons of maple syrup or honey 3 tablespoons of cacao butter 4 large ripe figs 1 teaspoon of vanilla extract 1-2 thumb size pieces of ginger (finely chopped) 3 teaspoons of ground ginger ¼ of a cup of filtered water A pinch of salt gingerfig2

What To Do:

The night before:
Soak your cashews in water.
For the base:
  1. Process the almonds into small pieces with the salt in a food processor or high-speed blender. Add the coconut, ginger, ground ginger, and coconut oil, and give a few pulses until combined. As I don’t have a food processor, I find it easier to blend the almonds into small pieces (but not dust), then mix the nuts with the other ingredients in a bowl.
  2. Press the base into the bottom of a spring-form 7 inch pan and place into your refrigerator until needed.
For the filling:
  1. Blend the cashews, almond milk, lemon juice, maple syrup, cacao butter, figs, vanilla, finely chopped ginger, and ground ginger in your blender or food processor until it blends to a smooth velvety mix. Add the filtered water to get a pourable but thick consistency. Blend again until silky smooth.
  2. Take your base out of the fridge and pour the filling in to the nut base in the pan.
  3. Place in the freezer for about 2-3 hours until firm.
  4. Take the cheesecake out of the freezer 1 hour prior to serving and place in the refrigerator until ready to serve.
  5. Garnish with a sprinkle of ground ginger and fresh figs.
  6. Serve and enjoy!

Bircher Muesli

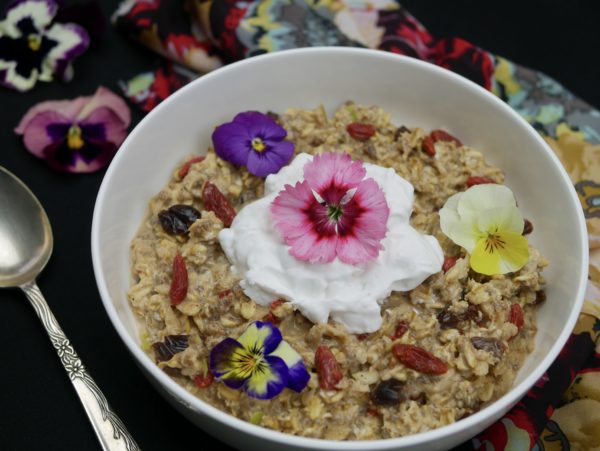
  Preparation:10 minutes plus overnight Servings: 4–5   I’ve always had a soft spot for bircher muesli. You can make this recipe the traditional way, with oats, or alternatively swap out the rolled oats for buckinis and coconut. This creamy bircher recipe is softly spiced with cinnamon, ginger, cloves, and a hint of cardamom. I love the addition of tart cherries, but any dried fruit would work well. This is a great breakfast to take with you if you start work early as I do. Portion the mixture into mason jars and pop in the fridge overnight to work its magic. It’s quick and easy to add fresh fruit in the morning, with a couple of boiled eggs to accompany it, before you head out the door.   Brain Food Note Oats contain B vitamins, magnesium, and fibre to help soothe and relax the mind. This bircher is made with walnut milk and chia seeds to provide all-important omega-3 fatty acids for optimal brain function. Add a spoonful of coconut yogurt for more of the healthy fat that the brain loves.   3 cups oats or 1 1/2 cups buckinis and 1 1/2 cups shredded coconut 1 tablespoon chia seeds 1 teaspoon ground cinnamon 1 teaspoon ground ginger 1/2 teaspoon ground cloves 1/2 teaspoon cardamom 1/4 teaspoon salt 1/2 cup goji berries 1/2 cup tart cherries 1/2 cup walnuts, chopped into small pieces 3 cups walnut or other nut milk 2–3 tablespoons maple syrup juice of 1 lemon 2 teaspoons vanilla extract 2 red apples (grated) coconut yogurt to serve   In a large bowl, mix all the dry ingredients together. Stir in the goji berries, cherries, and walnuts. Add the almond milk, maple syrup, lemon juice, and vanilla extract. Stir to combine. Cover the bowl and pop in the fridge overnight to soak. In the morning, stir in the grated apple and top with coconut yogurt to serve.  

Lemon and Date Amazeballs

My youngest daughter loves lemony sweet treats.  Her favourites are lemon curd muffins, lemon slices and lemon meringue pies.  As I'm sans an oven at the moment I can't "make over" her favourite baked treats into healthier versions, so I came up with these raw lemon and date balls. These little lemon and date balls didn't last long in our house! Tart and sweet at the same time, they are a great refined sugar, dairy and gluten free snack. Simple and easy to make and ooh so delicious.  They are great as an after school snack and lunchbox filler.  So simple to make, so get the kids helping in the kitchen. :)
You Will Need:
Desiccated coconut 1 ½ cups Cashews 1 cup Medjool dates 8 (chopped) Maple Syrup 2 Tablespoons Coconut Oil 4 Tablespoons Lemon Juice and Zest – 1 lemon Desiccated coconut ½ cup for coating  
To Do:
1. Pop all of your ingredients in a large bowl and mix together. I find using your hands to mix works the best. 2.  Blend until you can form dough with your hands. 3.  Roll dough into balls. 4. Put the topping coconut on a plate and gently roll the balls in the coconut. You can eat some now ☺ or place the balls in the fridge for about an hour to set. 5. Keep in the fridge and pull out for a little snack or they are great to pop into kids lunches. Recipe makes around 15 balls, or if you roll them smaller than I did, about 24. Yum.  

Creamy Cacao Coconut Yoghurt

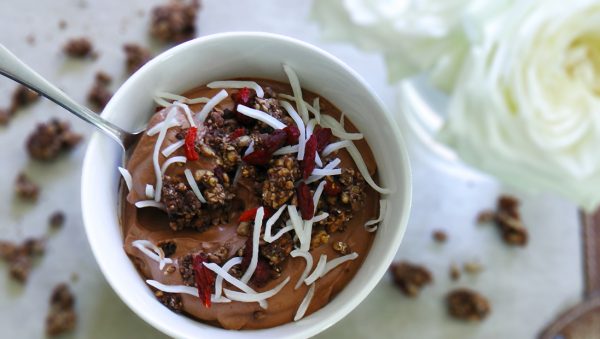
There is one thing I really miss since going dairy free and that’s YOGHURT! I love it and I used to eat it a lot, especially during blueberry season. Greek yoghurt and blueberries – yummm! That tangy taste, creamy texture, melt in your mouth… I could go on and on… Anyway, I gave up dairy and found coconut yoghurt! I could eat coconut yoghurt everyday too, but the problem is it’s really expensive. So, what can I do to feed my coconut yoghurt addiction? I make my own. I’ve been experimenting with making my own coconut yoghurt and came up with this simple delicious recipe. I make it using only 3 ingredients: coconut milk or cream, a sweetener, and probiotic capsules (plus cacao if you want the chocolatey kind, and I do). Simply combine the ingredients and leave to sit in a warm place for a day or two. Then voila! Creamy, chocolatey yoghurt for breakfast. You need a good quality coconut milk or cream to begin with, and also good quality probiotic capsules. All coconut cream / milk brands differ slightly, as do the probiotic capsules. You many need to adjust amounts slightly to produce a yoghurt of the consistency you like. cy2real  
You Will Need:
1 can of coconut cream or milk (use the full fat variety) 3 good quality probiotic powder capsules 2 tablespoons of maple syrup or honey 6 tablespoons of cacao powder
What To Do:
  1. Sterilise a glass jar, either by boiling in water or heating in a low oven for 10 minutes or putting it through your dishwasher.
  2. Warm the coconut cream or milk in a pan over a very low heat, until warm to touch.
  3. Pour the warmed coconut cream or milk into the sterilised jar, and add the powder from the probiotic pills.
  4. Add honey or maple syrup.
  5. Stir until well combined.
  6. Place the jar in a sunny place like a benchtop, for 12 hours. Alternatively you could also place it in a yoghurt maker or in a hot water cupboard wrapped in a tea towel.
  7. After 24 hours, add the raw cacao powder to the fermenting yoghurt and blend it all up in a high-speed blender.
  8. Pop yoghurt back in your jar, screw the lid on and place in the fridge for 1-2 days. You will find that the yoghurt will thicken considerably once stored in the fridge. It will also become thicker and slightly tarter each day.
  9. The yoghurt keeps up to 2 weeks in the fridge, but it won’t last that long!
  10. After 1 or 2 days, depending on how you like it, serve and enjoy! Serve a couple of spoonfuls on top of fruit, or in smoothies or with homemade granola. I have topped my cacao coconut yoghurt with goji berries and Little Bird Cacao Grawnola. Recipe makes a small jar or bowl full of yoghurt.
The greek yoghurt kind of thickness in the picture was achieved by using 3 good quality probiotic capsules and waiting for 4 days.

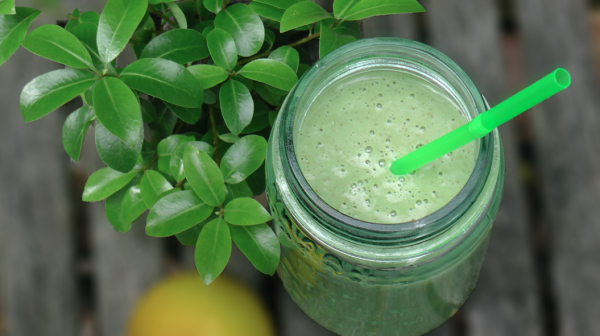
Spinach and Kale Green Smoothie

I'm really getting into green smoothies at the moment, and its something myself and my kids are loving and will definitely continue. Its a great way to get more veggies into your kids! Green smoothies are a delicious and quick way to download a massive amount of raw nutrients into your body every day. It's a good idea to combine healthy fats with your raw greens, as it helps your body to assimilate the nutrients. Here is a combination I love:  
Ingredients
Baby spinach and kale - handful Coconut Yoghurt 2 Tablespoons Coconut Milk 1/2 Cup Chia Seeds 2 Tablespoons Flaxseed Oil 1 Tablespoon Frozen Banana 1 - (freeze peeled and in pieces) Cold water to your preferred consistency Pop in your blender and blitz until smooth and creamy. Yum :)  

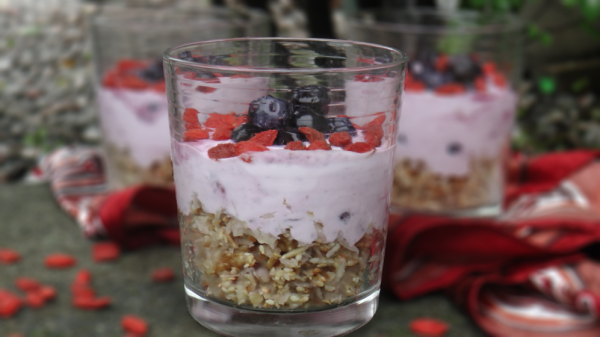
Berry Breakfast Parfait

I love breakfast, its my favourite meal, however sometimes only a simple breakfast of muesli will do. I love bircher muesli the most, so I decided to experiment and I came up with this delicate earthy breakfast parfait. This seed and nut muesli is slightly chewy and crunchy and is a great alternative to bircher muesli or I even have it as a dessert sometimes, with some shaved dark chocolate on top.
You Will Need
Sunflower Seeds - 1 Cup Sesame Seeds - 1 Cup Walnuts - ½ Cup Desiccated Coconut - 1 Cup Honey 2 Tablespoons Apple 2-3 small Berry Coconut Yoghurt – 1 small tub Blueberries or other berries of your choice - 1 Cup Goji Berries – Sprinkle on top of parfaits
To Do
1. Pre-heat oven to 175 degrees C. 2. Spread the seeds and walnuts out on a lined baking tray and toast in the oven until golden. Approximately 5-7 minutes. 3. Remove from the oven. Place seed mixture in a bowl. Spread coconut on the baking tray and toast for about 2 minutes. 4. Take coconut from the oven when golden and then add to the seed mixture. 5. Peel and grate apples and add to the seed mixture with the runny honey. 6. In a glass or little jar put the seed mixture first, then the berry coconut yoghurt and then top with your blueberries and goji berries. 7. Recipe makes 6 parfaits. These are great to make in the evening and have ready for your kids or yourself for breakfast. Yum.